Internal Gutter Brackets Installation

Welded Drain 2c Jpg 1020 911

The Tn Seamless Gutters Difference In Hangers Seamless Gutters Gutter Gutters

Image Result For Internal Gutter Details Gutter Design Details Design

Guttering Repair Guide Drains Gutter
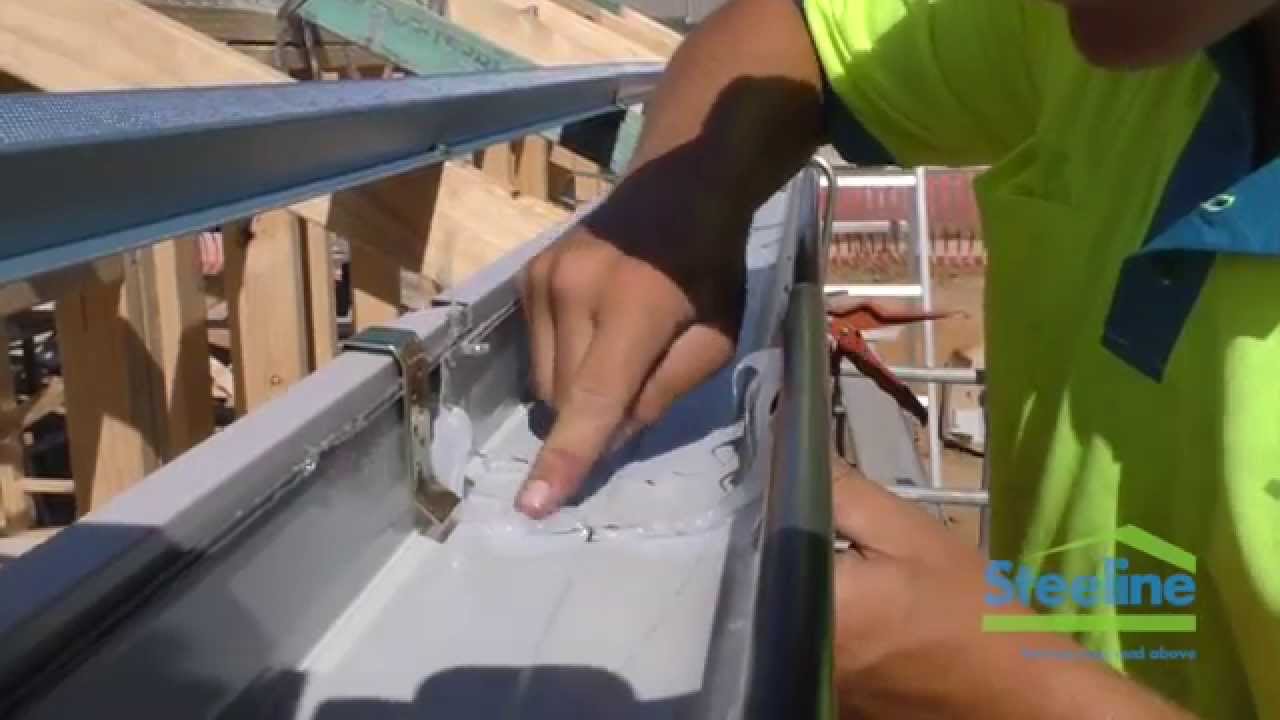
Steeline Installing Roof Gutters Youtube Gutters Installation Roof

The Leafguard Brand Gutter System Uses 032 Gauge Aluminum Which Is Approximately 20 Thicker Than Conventional Gut Seamless Gutters Cleaning Gutters Gutters

If you are using internal mounting brackets install them into the gutter first then attach the gutter pieces to the fascia using the internal brackets.
Internal gutter brackets installation.

Pergola Gutter And Cover Pergola Attached To House Outdoor Rooms Pergola Plans

Half Round Gutter Google Search Gutters Downspout Gutter

Products Guttering Steel Supplies Steel Fabrication Building Products Steel Products Stair Stringers Ste Steel Fabrication Steel Supply Roofing Supplies

Image Result For Internal Gutter Details Outdoor Decor Decor Outdoor

Ventilated Hidden Eaves Box Gutter Detail In Zinc Sig Zinc Copper 1000 In 2020 Box Gutter Zinc Roof Gutter

Building And Installing An Up Stand For Skylight Google Search Flat Roof Skylights Roof Installation Roof Skylight

Aluminum Gutter Systems Ply Gem Gutter Protection Gutters Ply Gem

Schmidt Fence Deck Pergola Plans Roofs Pergola Patio Front Porch Pergola

Eurocell Roof Components Double R Glass Roofing Ltd Glass Roof Roof

How To Spray Paint Gutters Painting Gutters Gutters Diy Gutters

Add A Rain Diverter Diy Gutters Rain Diverter Repair

Performance Patios And Decks Brisbane Patio Styles Patio Remodel Patio Style Patio Roof

Stratco Outback Sunroof Box Gutter Post Cap Beams

7 Sparkling Simple Ideas Porch Roofing Canopy Thin Concrete Roofing Metal Roofing Pat Construction Details Architecture Roof Architecture Architecture Details

Wood Multi Fuel Stoves At Coles For Fires Kettering Wood Stove Chimney Wood Stove Fireplace Wood Stove

Copper Gutters Copper Gutters Standing Seam Metal Roof Metal Roof

Gutter Replacement Gutter Replacement Western Suburbs Melbourne Gutter Repair How To Install Gutters Seamless Gutters

Leafguard Is Screwed To The Fascia Board With Internal Hanging Brackets Unlike Conventional Gutters Attached Seamless Gutters Gutters How To Install Gutters
Https Encrypted Tbn0 Gstatic Com Images Q Tbn 3aand9gcq7bhhexzpumf0fnpso0dudh2d4nq3hjplh U0lzjbhheqqr1tj Usqp Cau
Fitting A Flat Roof Door Canopy In 2020 Door Canopy Porch Canopy Over Door Canopy

Therma Skirt Buderus Kamco Power Flush Wapperingers Falls Ny Heating Systems Corner Wall Flush

Related Image Gable Roof Design Pergola Attached To House Building A Pergola

Rain Gutter Styles Rain Gutters Gutters Rustic Pergola

Drip Edge Installation To Prevent Water Dripping Behind A Rain Gutter Youtube Water Drip Cleaning Gutters Drip Edge
Source : pinterest.com
